There were some issues with the individuals squares of this project. Not all of them matched the sizes of Square 1, some were lopsided, and one was unattractive. I ended up making 11 of the listed 12 (with some modifications) and adding another 7 from Jan Eaton's 200 Crochet Blocks for Blankets, Throws, and Afghans.
Here's a breakdown of how I made the squares from the original pattern. My next post will detail my additions.
 Square 1: Checkerboard
I added two rows to the square to make it more square and less rectangular, so Row 15 becomes Row 17.

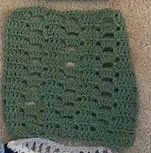
Square 2: Shell
I added 6 ch. to the foundation, so that I ended up with 6 shells in a row instead of 5. This matched the length of Square 1 much better. I did not add any rows.
Square 3: Network
I made no modification to this square. I used it as the size template for all the other squares to be consistent.
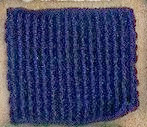
Square 4: Wavy Rib
I only made 20 rows in this square to match size. I really like the pattern, but you can't really see it because of the dark navy color, even in person.
Square 5: Double O Double V
This is the square I did not make because as I was in the process of hooking it, I found I did not like how the pattern was turning out. I substituted it with a new square from Jan Eaton's book.
Square 6: Crochet Cable
I actually made no changes to this square, but it turned out a bit lopsided. Joining it to the others helped straighten it out. I will caution you to be VERY loose with the Cable St. If you make it too tight the pattern looks a bit like sheaves of wheat, which could be interesting if you were going for a harvest look.
Square 7: Waves and Bobbles
I only followed the pattern to Row 18.
Square 8: Wagon Wheel
 |
| The 1st attempt of Square 8. |
In any case, it would not lay flat, especially after I joined it to the surrounding squares. I frogged it and started over, but the problem kept coming up after getting past Round 6. So I stopped following the pattern after Round 5 and started with the following pattern.
- Rnd 6: Sl st in next ch-3, (PS, ch 3, PS) in same sp (first corner), *ch 1, (dc in next sp and next dc) to next corner, **, (ch 1, PS, ch 3, PS) in corner ch-3 sp; rep from * twice more, then rep from * to ** once more; ch 1; join with sl st in first puff st.
- Rnd 7: Ch 3 (counts as dc), *5 dc in next ch-3 sp, dc in next PS, dc next sp, dc in each dc, dc in next sp, dc in PS; rep from * 3 more times, sl st in 3rd ch on ch-3.
- Rnd 8: Ch 3 (counts as dc), 2 dc, *3 dc in next dc (corner made), dc in each dc to corner; rep from * 3 more times, sl st in 3rd ch on ch-3.
- Rnd 9: Ch 1, sc in same space, 3 sc, *3 sc in next sc (corner made), sc in each dc to corner; rep from * 3 more times, sl in 1st sc. Fasten off.
The square lays much flatter than it did, but not still not entirely flat.
Square 9: Radiant
I added one more round before Round 8 in color C.
Square 10: Twinkle, Twinkle
I made the square as written.
Square 11: Slipstream
I first made the pattern as written, but as I went along, I noticed that the width started to shrink/tighten up do that it didn't match size. I frogged it and started over.
- Ch 45.
- Round 1: Sc in 2nd ch from hook, sc (sk 3 ch, 7dc in next ch [shell], sk 3ch, sc in next 3 ch) 4x, sc in last 2 ch. (4 shells total) Fasten off.
- Round 2: Join w/ch 3, Dc3tog, ch 3, 3 sc in next 3 dc, (ch 3, Dc7tog, ch 3, 3 sc in next 3 dc) rep 2x; ch 3, Dc4tog in last sc.
- Round 3: Ch 3, 3 dc in first st, (sk ch-3, 3 sc, sk ch-3, 7 dc in next st) rep 2x, sk ch-3, 3 sc, sk ch-3, 4 dc in last st. Fasten off.
- Round 4: Join w/sc, sc, ch 3, (dc7tog, ch 3, 3 sc, ch 3) rep 3x, 2 sc.
- Round 5: Ch 1, 2 sc, (sk ch-3, 7 dc in next st, sk ch-3, 3 sc) rep 3x, with only 2 sc in last rep.
- Rounds 6-9: Rep. rounds 2-5.
- Rounds 10-13: Rep. rounds 2-5.
- Rounds 14-17: Rep. rounds 2-5.
- Rounds 18-20: Rep. rounds 2-4. Fasten off.
Made as written.


No comments:
Post a Comment